Friday, January 11, 2013

Holiday Parties!


Ok, I know it has been almost a month since I posted an update.  It was my "holiday break" with school and while I continued to work I wasn't required to post or turn in time sheets.  This is a horrible excuse for not keeping up with everyone, but it was such a busy time of year at the shop and I was lucky to be able to make it home and eat dinner before I crashed into bed almost every night.  LOL

A huge part of this was due to all of the holiday parties.  We were so busy each week with orders for upcoming get togethers.  Not that I am partial, but one of the best parties was the December Bunco we hosted at my parents house.  If you dont know what Bunco is......well, it is pretty much a dice game that is an excuse for a group of friends to get together and socialize and it is usually held once a month at rotating locations so no one person is always stuck hosting.

Back to the party treats.  For Bunco we created a holiday finger food menu with both savory and sweet items........and of course a holiday "punch".  We made cranberry chili meatballs, crab puffs, pigs in a blanket (of course!) with a garlic mustard dipping sauce, ham and Gruyere pate a choux thumbprints (picture below), Tuscan olive dip, wrapped brie, and the ever present crudite platter.  Oh my gosh, how could I forget the cutest part of the savory spread!  I made penguins out of black olives, cream cheese and carrots.  They turned out to be adorable!!!


Now, on to the desserts! Earlier in the week I finished my little gingerbread house that originally was going to be one of the prizes for the evening, but then we decided we wanted to keep it and give away something else.....lol, so it became a decoration instead.  I wanted to create a dessert menu that was completely made of different flavors and themes we associate with the holidays also making sure there was enough variety that everyone should find something they like.  The starting line up is as follows:  Red Velvet peppermint cream cheese brownies, spice cake mini cupcakes with cream cheese whipped cream icing, Egg Nog cream puffs dipped in white chocolate, chocolate snowballs (cake balls), and of course gingerbread men.  It was quite a busy day off but so worth it.  I think the best part of everything I do is seeing other people enjoy what I have created.  It gives me such a sense of pride and just goes to confirm that this is what I should be doing and that I have made the right choice in the direction to change my life.


The Red Velvet peppermint cream cheese brownies were very easy to make and turned out beautiful.  They have just a hint of cocoa (just like the cake) and the peppermint flavoring is added to the brownie portion and not the cream cheese swirl.  These had just the right amount of all of the different flavors so they melded perfectly and had a nice fudgy texture. 


For the mini cupcakes I just made a simple spice cake mini cupcake and topped it with a cream cheese whipped cream icing.  Very easy, but they turned out super cute.


Unfortunately, I do not have a picture of the cream puffs (which I cannot believe!!!).  They were so yummy though.  I made some choux paste and piped it into petit four size, two bites....chomp chomp, (that was for you Chef Wilson....lol) and then once they were baked and cooled I filled them with an egg nog pastry cream and dipped them in white chocolate. 

Oh cake balls......how do I love thee.  Well, in truth depending on the cake ball.  I loved these little guys because they were super easy.  First I took some chocolate cake scraps and crumbled them into a bowl and added some simple syrup until it started to hold its shape when pressed into a ball.  Some people use icing for this step, but I actually prefer the simple syrup.  Once I scooped and shaped all of the balls onto a sheet pan I placed it into the fridge to set up while I cleaned up and set up the next step.  I then melted some white chocolate and put some shredded coconut into a shallow dish.  I first dipped and coated each ball in the white chocolate and then immediately rolled it in the coconut.  The result was a super moist delicious chocolate snow ball.  I think these were my favorite of the desserts.  First of all they were super cute and secondly I LOVE chocolate and coconut!


Each guest left with a goody bag of a gingerbread boy and a gingerbread stocking.  We really had the best time that night and I am so blessed to be able to share my passion with others and see them enjoy my creations.  Again, I cannot wait to get back to Tallahassee and move forward with my shop.  I am learning so much here and I have so many people to thank for that. 


I hope you all had a fantastic and blessed holiday season filled with all of the joys of the season!  Now, its time to party and move into Carnival season, king cakes and MARDI GRAS.......but that my friends is for another post.  Most of you know I normally sign off with Keep It Sweet, but thanks to my amazing husband and son I may have to change it up a little bit.  They got me the cutest sign for Christmas.  They told me it was for me to hang in my shop someday.  Love these boys!!!!


Soooooo, always remember Life is Sweet!

Thursday, December 13, 2012

Weddings, weddings and more weddings!

There have been several weddings since I have started my externship and I am learning a lot about how to prepare for them.  There have been wedding cakes and grooms cakes a plenty!

Whenever a bride calls about a wedding cake a tasting is then scheduled.  The bride and usually the groom come in and meet with either the owner or the pastry chef to sample at least a chocolate cupcake with chocolate buttercream icing and a wedding cake cupcake (almond) with almond buttercream icing and discuss what type of cake they (she) would like.  :)  Whomever meets with the bride takes down all of the details and then the pastry chef usually does a rough sketch of the cake for approval.  A price is quoted, a deposit is made, and the rest is history.   

Some of the cakes have come with an important lesson, such as the popcorn bowl grooms cake.  The bride came in for a tasting and ordered both her wedding cake and the grooms cake.  It was a surprise for the groom and she wanted to have it look like a bowl of popcorn because her fiance really liked popcorn.  She was quoted a price and the order was placed.  At a later date the bride called and wanted to change the order from a bowl of popcorn to a vintage red and white popcorn container.  The Chef said no problem and changed the order.  What he later realised was that he should have reconfigured the price because the new cake was going to be a lot more work than the first order.  Of course, he did not change the price at the last minute, but instead used it as a learning experience for both of us.......lol

There have been some beautiful cakes and some "interesting" cakes to say the least.  I have had many opportunities to observe Eric each weekend as he creates each bride's idea of her perfect cake.  I think the trend of fondant wedding cakes may be wearing out or it could just be here in New Orleans, but there have been more buttercream coated cakes than fondant covered cakes in the weeks I have been here.   I am so thankful for the opportunity to learn more about the world of wedding cakes. 
 
Unfortunately, I don't have any pictures of these beautiful cakes.  :(  However, I do have pictures from the first two weddings of which I had the pleasure of making the desserts.  I have said this before but, appropriately enough my first wedding was for two of my biggest supporters in my Pastry Chef venture.......my nephew Mac and my "now officially" niece Tarah.  Their wedding was amazing!  They did not want a traditional wedding cake, but asked me to create a dessert buffet of some of their favorite desserts.  These consisted of handheld apple pies, banana pudding parfaits, pecan tartlets, chocolate cake (Mac's grandfather's recipe), and a choice of either s'mores cupcakes with toasted marshmallow icing or sweet potato cupcakes with maple buttercream icing.  Everything turned out deliciously fantastic. 


To top off the evening they asked me to create a cookie bar as the favors for the wedding guests. The choices were: the bride's favorite (peanut butter), the groom's favorite (snickerdoodle), their son Rylan's favorite (sugar cookies with sprinkles), and everyone's favorite (chocolate chip). 


I created my first actual wedding cake the week before I left Tallahassee for a sweet, sweet bride named Kaycee that works with my niece Tarah (see first wedding above.....lol).  She wanted cake for 200 people, but really only wanted three tiers.  We ended up with the three tier cake she wanted and an extra full sheet cake to be cut and served out of the kitchen to make up the rest of the needed 200 servings.  Kaycee had a beautiful southern wedding with lots of country style charm.  Her cake was a yellow cake with buttercream icing in a plaster finish with fresh sunflowers.  The wedding was held at a location that was down a dirt road to I decided to assemble the cake on site.  I was nervous enough and didn't want the nightmare of having the cake fall over as I drove down the bumpy dirt road.  My sister came with me to make the delivery and I am so glad she was there because she certainly kept me calm since when I got there and asked the florist for the flower topper for the cake I was directed to a bucket of sunflowers.  Soooo, knowing that you really can't put fresh flowers straight into a cake I quickly trimmed the sunflowers, wrapped the stems in some plastic wrap that I brought with me, and then inserted them into the top and at each tier.  I think the end result came out beautiful!  Kaycee was on her honeymoon when I left Tallahassee, but I was told she really liked the cake.  Phew, I feel like I just earned my first Pastry Chef badge.


Don't you love the stand!  I wish I could say it was mine, but she borrowed it from her aunt.  The more wedding cakes I witness being created the more and more anxious and excited I get about getting back to Tallahassee and starting to work on the opening of Sweet Inspirations!
 
I hope you are all having a wonderful stress free holiday season and remember in the midst of all of the holiday craziness to take some time to enjoy your family and the things that truly matter.  As you enjoy all of those delicious holiday treats remember that it is I who always remind you to Keep It Sweet!

Friday, December 7, 2012

Holiday Bling

Tis the Season for some bling.......falalalala lalalala
and I'm not talking about a ring....falalalala lalalala
Holiday parties will happen soon.....falala lalala la la la
with lots of treats to make you swoon.....falalalala la la la la

Everyone knows that I love pastry......falalalala lalalala
so I made some truffles that are tasty......falalalala lalalala
So as you think of carols to sing.........falala lalala la la la
enjoy a chocolate with some bling.......falalalala la la la la

Ok, enough of my silly little song.  Seriously, I have rediscovered a love for all of the bling in the world of chocolates.  This week we have been super busy creating over 600 molded chocolates for an order to be shipped out for a holiday party.  There were several different shapes and flavors to choose from all of which are fabulous!  We dusted each of the completed chocolates with different color luster dusts for a super colorful sparkly holiday effect.......Bling!

When making molded chocolates you have to first coat each of the cavities in the mold with chocolate.  This happens when you fill each of the cavities with chocolate, tap the mold on the table to release any air bubbles (when I say tap.......translate to gently bang), and then pour out the extra chocolate and run a scraper across the top of the molds.  This will leave just enough in the cavities to create a shell for a delicious filling.  After this chocolate sets you pipe some sort of filling such as caramel or a flavored ganache into each of the cavities being careful to leave enough room to top each off with additional chocolate (this is called the foot).  You then pour chocolate over the tops of the cavities and again run a spatula or scraper across the top to remove the extra chocolate.  The molds are then put aside to set.  Once the chocolate is set you place the molds into the cooler for just a few minutes so that when you take then out and turn them upside down the chocolates pop cleanly out of the molds without much effort.  Most molds make chocolates that are beautiful at this state, but of course we wanted to kick it up a notch so out came the luster dust and disco dust.  All was finished and shipped out Tuesday evening.......Score!!


Mid-week we had another big order due on Thursday for a local holiday party.  260 truffles and 260 chocolate covered strawberries.  I worked on the truffles and finished all of them packed and ready to go on Wednesday evening.  Go me!  The truffles were an assortment of flavors (bananas foster, orange, lemon, praline, raspberry, passion fruit, 58% chocolate, 74% chocolate, brown butter, and creme brulee) and start out as a flavored ganache that sets in the cooler and is then scooped into a ball.  These are cooled until they are firm.  Once they are ready I took them and dipped/ rolled them in chocolate and coated them in a variety of toppings.  We use cocoa powder, raspberry powder, chocolate flakes, white chocolate flakes, a mixture of white and dark chocolate flakes, dark chocolate vermicelli, milk chocolate vermicelli, white chocolate vermicelli, a mixture of all three vermicelli, and croquant.  BUT for this order we had a little twist........100 of the total 260 truffles needed to be shiny, sparkly and full of bling!  Sooooo, these truffles were rolled in the chocolate and allowed to harden without a topping.  Once they were set I first took silver luster dust and brushed each truffle, and then sprinkled each with silver disco dust (basically edible glitter).  They were awesome!!!!!!


The chocolate dipped strawberries are so good!  We use fresh from the farm Louisiana strawberries, wash and dry them, dip them in either dark chocolate or white chocolate, and then strip them with the contrasting chocolate.  You have to be sure and dip the white chocolate ones twice so you get a nice coating.  Not much else to say about these except that there is nothing better than a plump juicy strawberry coated in chocolate.
 
 
Now, go ahead and wipe the drool off of your chin.  Lol
 
If you are in the midst of planning a holiday party I wish you a party full of festive fun and good times with great friends and family........and no planning nightmares.
 
and of course for all of your holiday parties remember to.......Keep it Sweet!
 

Wednesday, November 28, 2012

Pralines, and Kisses and Turtles.....Oh My!

I survived my first holiday in the pastry business.  I posted last week about all of the pies and other goodies we made for the holiday, but this week is all about confections.  I have finally had the chance to make a few more items that are in the shop that are on the confectionery side of things.  Yay! 

Those of you who have known me through school are probably surprised at my excitement given that confections and chocolates (although delicious) were not my favorite subject in school.  However........I have seen the light!  Working with it more at Bittersweet has given me a whole new outlook on the world of confections.  This week I had the opportunity to try my hand at some items that we carry in the shop like pralines, caramels, meringue kisses, marshmallows and turtles.

New Orleans is known for pralines like Philadelphia is known for cheese steaks.  Pralines are these yummy, sugary, caramely flavor, pecan, cookie looking confections.  They are shaped kind of like a cookie, but are nothing but sugary pecan goodness.  They can be very finicky in that you have to be sure and watch your temperatures when cooking the sugars very careful.  It is easy to mess these things up people!  You have to cook down sugars, butter, cream and milk to a specific temperature and then add the pecans and cook a little more, and then take it off the heat and cool to yet another temp.........then stir, stir stir until it looks creamy and hurry up and scoop them before they start to crystallize.  Phew, now you have made pralines.  Sounds easy right????

  
Every time I make meringue kisses I think of my friend Michele back in Tallahassee.  I remember when she discovered these in the local grocery store and she has been hooked ever since.  I really need to take her some one day.  :)  Meringue kisses are basically these little clouds of sugar that are light and airy and crispy and YUM!  First, you have to make a nice stiff meringue of whipped sugar and egg whites, and then here we also fold in powdered sugar at the end.  After your meringue is ready you fill a piping bag and pipe the meringue into little kisses of white sugar cloud and bake them at a very low temp for a looooooong time until they are dried out.  If you don't bake them long enough they will collapse as they cool.  In school we learned that you can put them in an oven that has recently been turned off and let them sit overnight as well.  I haven't tried this method so I can't comment on how well it works......yet.  At the shop these little cuties are then sandwiched together with chocolate ganache and then half dipped in the chocolate and rolled in chocolate vermicelli (sprinkles to most of us....lol).  We also made a batch of chocolate chip meringue kisses that were individually half dipped in chocolate and rolled in the vermicelli.  I was never one for meringue, but I am a changed woman.  These things are tasty!


Turtles, oh how I love turtles!  We offer two different ways to enjoy a turtle at Bittersweet; one as the traditional confection and one as a cookie.  To make the traditional turtle you have to first toast some pecan halves and then lay four of them out for the "feet".  I have also made them with 5 halves using one for the "head", but here we use four for just the feet.  We then make caramel and pour just a spoonful at the center where the four halves meet letting some of it spill out one side a little more to form the head of the turtle.  Once the caramel sets it is topped with chocolate and then striped with additional chocolate.  We also paint the bottoms of the turtles with chocolate so the caramel doesn't cause them to stick together in the package.  Oh, the wonderful and simple tricks I am learning to make things easier in the long run.  The turtle cookies are so good!  You start with a sort of shortbread cookie that has a hint of caramel flavor and then a rich chocolate fudge icing is piped on top.  Usually we sprinkle toasted pecans on some of the cookies and leave some without nuts for those who don't like them.  Crazy I tell you, Crazy.......who doesn't like nuts!  Well, excluding my friend Zach and all other who are allergic.  You are forgiven since we know you would if you could.  :)


Well, that is it for this edition and I hope you are enjoying keeping up with my journey as much as I enjoy sharing it.

As they say in New Orleans......Laissez les Bon Temps Rouler!  (Let the Good Times Roll)
and as I say......Keep It Sweet People!

Friday, November 23, 2012

Bring thankful for Thanksgiving

Thanksgiving is a time for being thankful and I have so much to be thankful for this year.  My wonderful family and friends who have been so supportive of me and my journey to becoming a pastry chef and this awesome opportunity that I have to learn at Bittersweet Confections just to name a couple.

This was a very busy time at Bittersweet Confections.  This week not only did we have many of our usual cakes and confections to make, but we had pies to make.  Lots and lots of pies to make.  We offered three kinds of pie for the holiday, as well as a couple of different cakes.

Pies
As for the pies we made both 9 inch pies and 3 inch individual pies for people to pick up.  We had a few orders before we even began, but of course there were many, many drop ins looking for something delicious to add to their Thanksgiving spread.  I was very proud of my pies thank you very much!  :)  We had a bourbon pecan pie, dutch crumb apple pie, and of course, pumpkin pies.  I don't even remember how many we made, but it was a lot!


Cakes
We had a few orders for cakes and I was able to make one of the red velvet cakes that was ordered from start to finish.  I pretty much make all of the cake for the shop, but I rarely get to ice and decorate them.  The head pastry chef Eric takes care of most of those so needless to say I was very excited to show a little skill.  We also had an order for an eggless carrot cake.  It wasn't vegan so the customer still wanted the cream cheese icing.  He just wanted to make sure there were no eggs in the cake.  I have to say I was very surprised at just how moist and delicious this cake turned out.  I wasn't able to get a picture before he picked it up though.  :(  We also went ahead and prepared a few of our chocolate mousse cakes that are coated in chocolate ganache (uh, can you say YUMALICIOUS!) and they were ready to be decorated with a cute turkey for the holiday. 


Thanksgiving Day
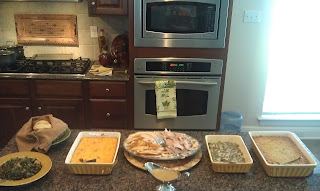
This was by far my favorite day of the week because I got to see my boys!  I have missed them so much and I can't believe it has been a month since I have seen them.  They arrived on Wednesday night with my mother in law for the holiday.  Even though it was just the four of us we had quite the feast.  I baked a nice little turkey, cornbread dressing, mac and cheese, collard greens, green bean cassarole, rolls, and of course gravy.  I have lots of leftovers.....lol  It was a busy week with working every day and then prepping for Thursday in the evening, but it was so worth it.  I was also able to squeeze in some delicious desserts.  We had spice cake with cranberry filling, chocolate silk pie, apple pie, and pumpkin pie (duh). Even though this paragraph wasn't actually about what I did at work, I thought it was a great lesson in multi tasking and making the most of your time.......not to mention it was about all of the cooking and baking I did too! 


I hope you all had a wonderful time with family and friends and took a moment to reflect on all of the things we should be thankful for in our lives. I had to say goodbye to Lane and Brandon again this morning and it was a tough morning for sure.  I will be counting the days until I see them again. 


Instead of my usual "Keep it sweet" sentiment I will leave you with another in honor of the holiday.

May your bellys be full and your hearts be stuffed with love!

See you next week! 


Friday, November 16, 2012

Filling up the case!!


One of the most important things that Cheryl stresses to us is to always be aware of the case. This would be the front display case where the customers see all of the deliciousness that is Bittersweet Confections!

There are always many, many items in the case at any one time and let me tell you when a couple of things are missing you can really tell. This is such an important part of my job because if there are no items in the case, then there is nothing to sell.

The left side of the case is full of all of the beautiful truffles that we have to offer. Each truffle is hand made and there are so many flavors to choose from that are all delectable.  Look for more delicious details in a future post.  lol

 The right side of the case is our domain, meaning Grace (my co-worker) and I. We help with the truffles too, but the right side of the case is where we shine. :) The top shelf is always full of cupcakes that we prepare each day. There are both filled and un-filled cupcakes and there are of course flavors that are there every day and some that make special appearances, but talking about the amazing cupcakes will be yet another post.

This week I also prepared some peanut butter cups, cheesecakes, and petit fours for the case. The peanut butter cups are not exactly what you would imagine. We first create a chocolate shell by painting chocolate into the wax paper cup and then pipe the peanut butter ganache into the shell and decorate with a couple of macados, a white chocolate/ chocolate striped decoration. The painting of the shells can get quite time consuming so this week we are trying out some premade chocolate shells ordered from the same swiss chocolate company. So, same great chocolate, but a little bit easier for us. Win, win if you ask me!


Cheryl had me try out a new recipe for personal sized cheesecakes that turned out to be so easy, but delicious and creamy all the same. We baked the cheesecakes in muffin liners for the personal size and then tried out a couple of different ways to serve them. First we prepared a sweetened sour cream sauce to spread on the cheesecake and then topped that with some fresh fruit. They looked a little small that way so we then decided to try something similar to the way we prepared the cupcakes for the Music in the Park series from last month. (see previous post) We took the clear plastic cup and spooned some fruit compote in the bottom of the cup, placed the unwrapped cheesecake on top and then spooned on some additional compote, topped it with a dollop of fresh whipped cream and a strawberry half. We decided that was a little too much compote so we changed it up a bit. The cheesecake is baked with a graham cracker crust so we came up with our final winner (I think). I used the same plastic cup and spooned some graham cracker crumbs into the bottom, placed the unwrapped cheesecake on top and spooned some compote on top of that, piped a little whipped cream and placed either a strawberry half or a few blueberries on top. When I took my break later in the day I noticed a man had ordered one and the next thing I knew I saw him licking out the cup! Winner!!!!


I also prepared some petit fours for the case this week. Most people think of a petit four as a small bite sized cake, but it can actually be any small dessert that is about two bites. Petit fours can also be savory, but most consider a petit four to be something sweet for a dessert. Our petit fours are made of simply of almond cake that is covered with a poured fondant and decorated with a buttercream swirl and a little fondant decoration like a flower like in the my picture below. Grace and I are talking about making little snowflakes or ornaments for the petit fours during the holidays. Other petit fours that I have made in the past have a thin layer of raspberry jam between two layers or on the top of the cake before the fondant is poured over, but this is not always done.


I am learning so much and even though I am missing my Tallahassee family I am having a blast just soaking up all of this pastry chefness.  Is that even a word????  Well, it is now!  :)

You know what comes next........Keep it Sweet people!!


Friday, November 9, 2012

Cake!


This week at work I finally had the opportunity to decorate some cakes! Everyone who knows me, knows I love to make cakes........and cupcakes of course. Each week I have baked lots and lots of cake that has been used for birthday cakes, grooms cakes and of course, wedding cakes.  All of the cakes and cupcakes at Bittersweet Confections are made from scratch which does take a little longer, but the results are well worth it and I know the customers appreciate it too. 

Well, this week I finally was able to actually decorate some of the cakes that I baked. Eric, the pastry chef, was out of the shop on Tuesday and we had two orders for cakes so Grace and I finally got to decorate. :)


Red Velvet Birthday

Our first cake was a joint effort and was a 6in. red velvet cake that I baked the day before. I iced the cake with some of the yummiest cream cheese icing I have ever made. I masked the sides with cake crumbles and Grace wrote the message in chocolate. Grace is wonderful with writing in chocolate and I can't wait to learn more from her. She has worked in the industry in different New Orleans hotels for a few years now and said they all of them write in chocolate so she has had a lot of practice with it. I have more experience with writing in buttercream icing than she does so we make a pretty good team.....lol


Petite Cakes

In the shop we have what are called petite cakes. They are small approximately 3 inch chocolate cakes that are filled with chocolate mousse and covered in chocolate ganache. These are very popular in the shop and would be a nice little personal sized birthday surprise for a friend or co-worker. They really are the perfect size for a good chocolate fix or you could share if you really wanted to and both people would be satisfied. I have tasted these cakes and personally I'll keep mine to myself thank you very much.


Obama Cake

On Election Day we had an order for a 6in. vanilla cake decorated with the Obama symbol. Since Grace had already left for the day I got to do this one all by myself! I made this cake from start to finish, the baking and the decorating. :) The vanilla cake was a chiffon cake that we make from scratch. We make the base cake batter with butter, sugar, flour and leavening ingredients and then a meringue is made and folded in. It can then be flavored accordingly and baked into a cake that is so fluffy and absolutely delectable. It was decorated in buttercream and I piped the design in stars (appropriate for Election Day don't you think???) I kept waiting for a Romney order to come in too, but nope. I thought it would be fun to take a picture of them side by side. 


Eric makes all of the wedding cakes, grooms cakes and really most of the orders that come in.  I am hoping that as Grace and I have opportunities to decorate cakes he will let us help with some of the orders.  He is very talented and I am really looking forward to learning from him.  A couple of weekends ago he made a grooms cake that looked like a red and white popcorn box.  I wish I had taken a picture to post, but that was a very busy day and there was no time to stop and take out the phone and snap a pic.  The fake cake that is on display now (pictured below) is one that he made and it really a neat design.  I can't wait to learn more and get some more experience with fondant. 


More to come later.  Keep it sweet folks!